Immer schon einmal wollte ich per Apple Remote einen Arduino steuern. Und nun endlich habe ich mir die Zeit dazu genommen. Nach wirklich vielen Seiten im Netz habe ich mir die verschiedenen Teile zusammengesucht und ein Beispiel gebaut, was sehr simpel ist.
Es beruht auf der Bibliothek IRremote für den Arduino, die es bei GitHub frei zum Download gibt.
Alle Beispiele, die ich im Netz fand, konnten nicht mit den aktuellen Apple Remotes umgehen, aber letztendlich war es kein Problem diese mit den Beispielen im Code „auszulesen“ und in eigenen Code zu integrieren.
Meinen Sourcecode gibt es hier zum Download. Und das beste: Er funktioniert mit mit den beiden letzten, aktuellen Apple Remotes (aus Aluminium):

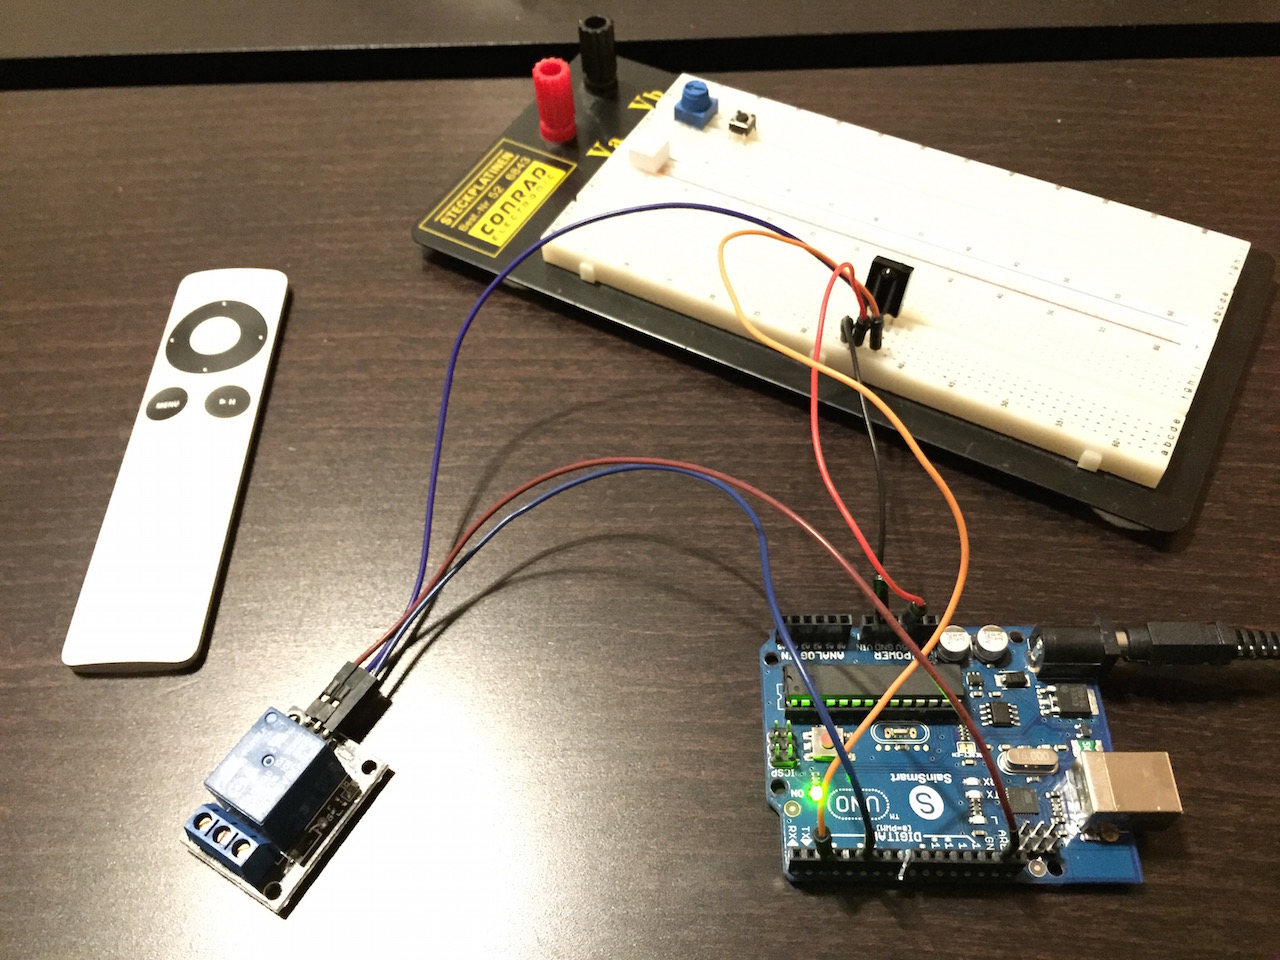
Für die Hardware werden lediglich ein Arduino Uno, ein Infrarotsensor (zum Beispiel ein TSOP1736) und ein Relais benötigt. Der Aufbau ist entsprechend simpel:
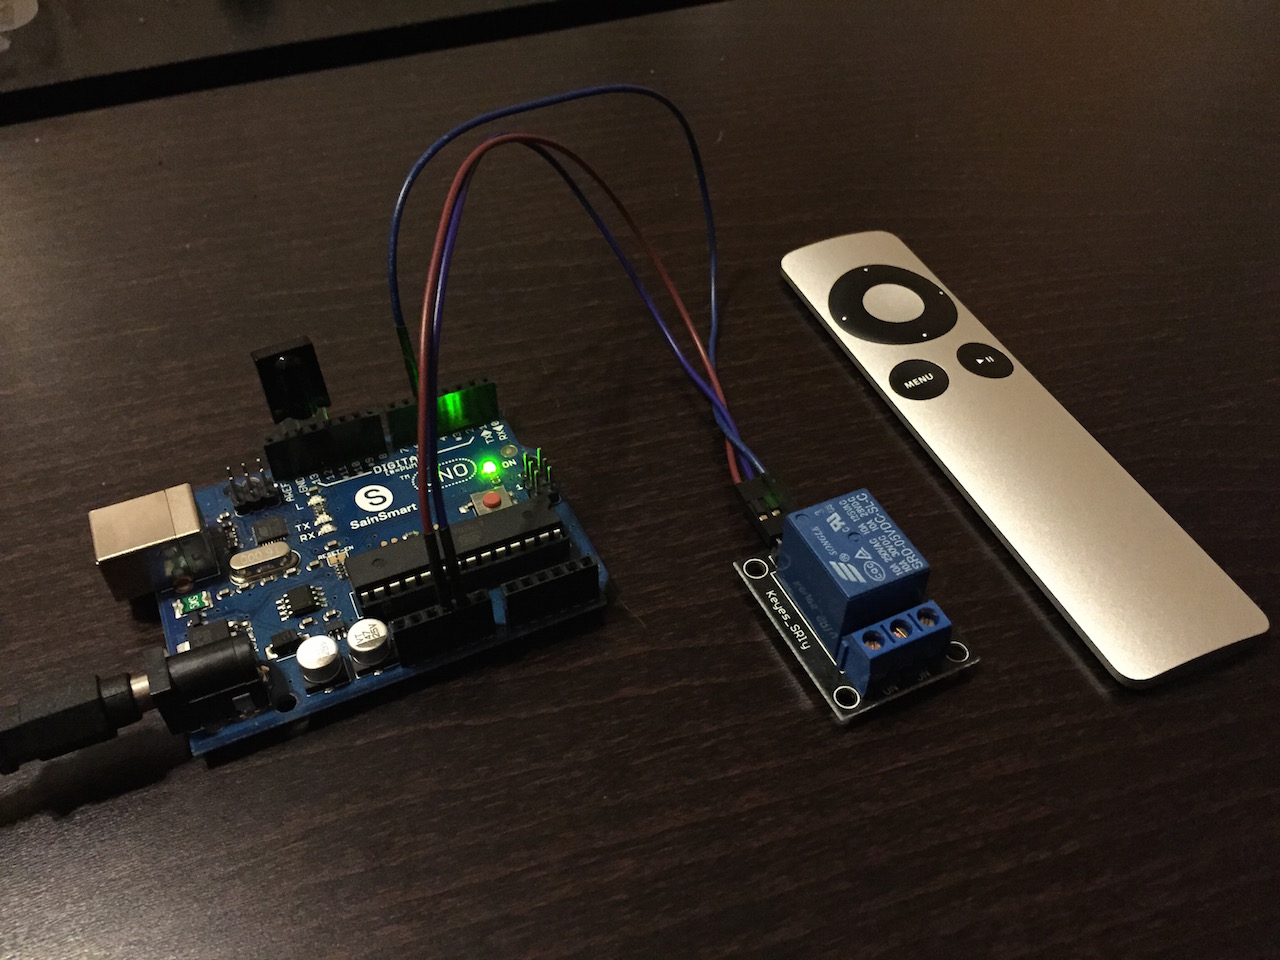
Wer es noch einfacher haben möchte, kann den IR-Sensor auch direkt in das Arduino-Board stecken. Hierbei ist ein Pin in GND zu stecken und die anderen beiden in die Digital-Ausgänge. Die Stromversorgung erhält der Sensor dabei über einen auf HIGH geschalteten Pin des Arduino. Dieses ist hier möglich, da der Sensor nur 1 mA an Strom aufnimmt. Das Ganze sieht dann so aus:
Und hier noch einmal im Detail:
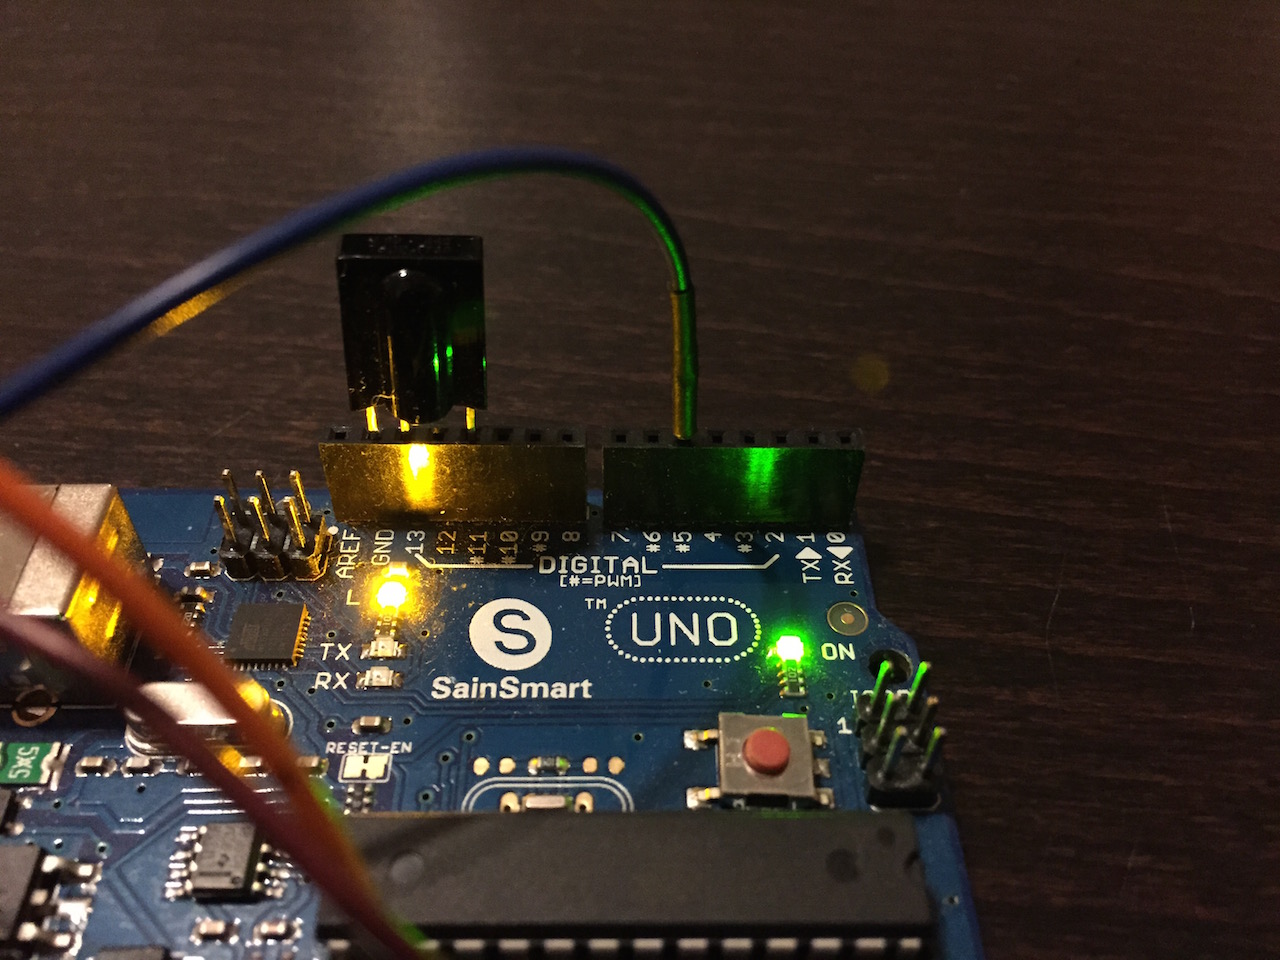
Dazu muss dann natürlich der Code angepasst werden, damit der LED-Pin (13) hier immer HIGH ist!
Und so sieht es dann im kurzen Video beim Testen aus:
https://vimeo.com/115763865
Und hier noch der Sourcecode zum Anschauen:
#include <IRremote.h>

// Werte, die die Apple Remote "runder Donut, Alu" sendet
unsigned long oben   = 2011287637;
unsigned long unten  = 2011279445;
unsigned long links  = 2011238485;
unsigned long rechts = 2011291733;
unsigned long ok     = 2011282005;
unsigned long menu   = 2011250773;
unsigned long play   = 2011265621;
unsigned long repeat = 2011242581; // Wird bei ok und play zusätzlich gesendet

/*
// Werte, die die Apple Remote "flacher Donut, Alu" sendet
unsigned long oben   = 2011287644;
unsigned long unten  = 2011279452;
unsigned long links  = 2011238492;
unsigned long rechts = 2011291740;
unsigned long ok     = 2011282012;
unsigned long menu   = 2011250780;
unsigned long play   = 2011265628;
unsigned long repeat = 2011242588; // Wird bei ok und play zusätzlich gesendet
*/

const int RECV_PIN  = 2;  // pin for TSOP1736 IR sensor output
const int LED_PIN   = 13; // pin for the onboard LED
const int RELAY_PIN = 5;  // pin to switch a relay

boolean relayState = false;

IRrecv irrecv(RECV_PIN);

decode_results results;

void setup()
{
  Serial.begin(9600);
  irrecv.enableIRIn(); // Start the receiver

  pinMode(LED_PIN, OUTPUT);
  pinMode(RELAY_PIN, OUTPUT);
}

// Storage for the recorded code
         int  codeType = -1;     // The type of code
unsigned long codeValue;         // The code value if not raw
unsigned int  rawCodes[RAWBUF];  // The durations if raw
         int  codeLen;           // The length of the code
         int toggle = 0;         // The RC5/6 toggle state

// Stores the code for later playback
// Most of this code is just logging
void storeCode(decode_results *results)
{
  codeType = results->decode_type;
  int count = results->rawlen;

  if (codeType == UNKNOWN)
  {
    Serial.println("Received unknown code, saving as raw");

    codeLen = results->rawlen - 1;

    // To store raw codes:
    // Drop first value (gap)
    // Convert from ticks to microseconds
    // Tweak marks shorter, and spaces longer to cancel out IR receiver distortion
    for (int i = 1; i <= codeLen; i++)
    {
      if (i % 2)
      {
        // Mark
        rawCodes[i - 1] = results->rawbuf[i]*USECPERTICK - MARK_EXCESS;
        Serial.print(" m");
      }
      else
      {
        // Space
        rawCodes[i - 1] = results->rawbuf[i]*USECPERTICK + MARK_EXCESS;
        Serial.print(" s");
      }
      Serial.print(rawCodes[i - 1], DEC);
    }
    Serial.println("");
  }
  else
  {
    if (codeType == NEC)
    {
//      Serial.print("Received NEC / Apple: ");

      if (results->value == REPEAT)
      {
        // Don't record a NEC repeat value as that's useless.
//        Serial.println("repeat; ignoring.");
        return;
      }
    }
/*
    else
    {
      if (codeType == SONY)
      {
        Serial.print("Received SONY: ");
      }
      else
      {
        if (codeType == RC5)
        {
          Serial.print("Received RC5: ");
        }
        else
        {
          if (codeType == RC6)
          {
            Serial.print("Received RC6: ");
          }
          else
          {
            Serial.print("Unexpected codeType ");
            Serial.print(codeType, DEC);
            Serial.println("");
          }
        }
      }
    }
*/

//    Serial.println(results->value, HEX);
//    Serial.println(results->value, DEC);

    codeValue = results->value;
    codeLen = results->bits;
  }
}

void loop()
{
  // wait for IR signal
  if (irrecv.decode(&results))
  {
    // LED on
    digitalWrite(LED_PIN, HIGH);

    // store result for convenience
    storeCode(&results);

    // resume receiver
    irrecv.resume();

    //---------------------
    // "translate" to text
    //---------------------
    if (codeValue == menu)
    {
        Serial.println("[MENU]");
    }
    else
    {
      if (codeValue == play)
      {
          Serial.println("[PLAY]");
      }
      else
      {
        if (codeValue == oben)
        {
            Serial.println("[OBEN]");
        }
        else
        {
          if (codeValue == unten)
          {
              Serial.println("[UNTEN]");
          }
          else
          {
            if (codeValue == links)
            {
                Serial.println("[LINKS]");
            }
            else
            {
              if (codeValue == rechts)
              {
                  Serial.println("[RECHTS]");
              }
              else
              {
                if (codeValue == ok)
                {
                    // toggle relay state
                    relayState = !relayState;

                    // switch relay
                    digitalWrite(RELAY_PIN, relayState);

                    Serial.print("Relais ");

                    if (relayState)
                    {
                      Serial.println("on.");
                    }
                    else
                    {
                      Serial.println("off.");
                    }

                    Serial.println("[OK]");
                }
              }
            }
          }
        }
      }
    }

    // LED off
    digitalWrite(LED_PIN, LOW);
  }
}
Nett, oder?
Ein Kommentar zu „230V Relais schalten mit Arduino und Apple Remote“